 Wouldn’t it be nice if they sold Photoshop in a bottle? You know, so you could easily remove your wrinkles in real life, or delete that zit or whiten your teeth? I’d be all over that product;) Unfortunately though, there’s not a magic cure, but you can make fixes to your pictures in Photoshop! It’s pretty easy to brighten and whiten those teeth using Photoshop in just a few quick steps. Wanna learn how? Watch or read below to see how you can brighten and whiten teeth in your portraits in Photoshop.
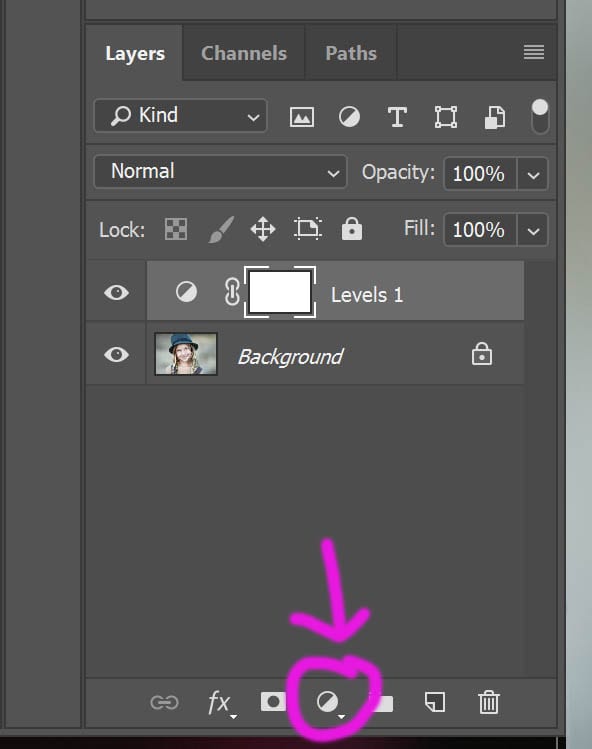
First
Create a levels adjustment layer in the adjustment panel.
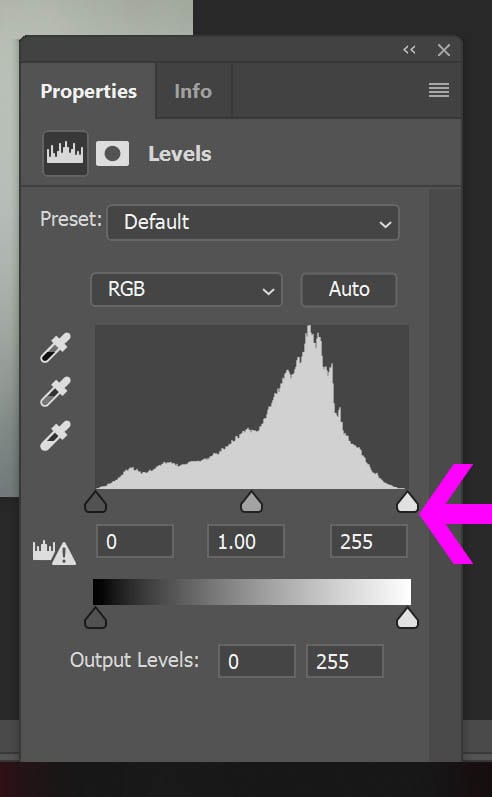
Next
Drag that white triangle you see noted below to the left. This will brighten up the entire image. You don’t want that, so you’ll need to invert that layer mask. Press Cnt I (or Cmd I) to invert. Then take a large soft and white brush and brush over the teeth. (View the above video for more detail) Adjust the opacity of the levels layer if it appears too bright.
Then
Sample a few colors in the teeth to see what you’re really working with. I know it’s a bit of a shocker, but your teeth aren’t really pure white? Taking the eye dropper tool and sampling some colors within the teeth will give you a better idea of the colors ranges you are really working with. (Here you’ll notice, the teeth actually have a lot of green range)

Next
Now that you know the colors your working with, the next step will be a bit easier. Create a new adjustment layer and select hue/saturation. On the drop down color menu, we’ll select green (remember when we checked it earlier- your photo might have different color ranges in the teeth) Then just drag that saturation slider to the left.
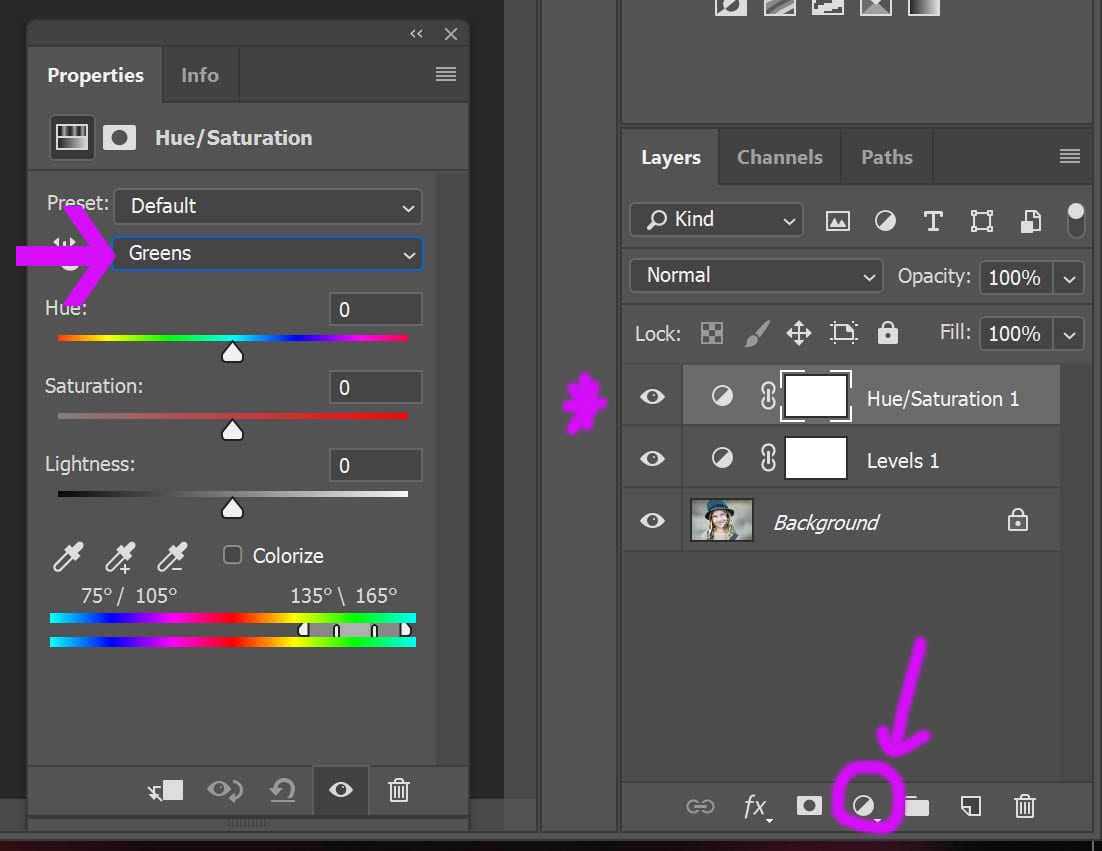
Finally
Invert that saturation adjustment layer (cntl or cmmd I) and paint on the teeth. Adjust the opacity to your liking ans there you have it!

If you do try this tutorial out, I’d love to see what you create. Make sure to mention or tag me over on Instagram @cozyclicks or in your stories so I can see what you’ve got!

To see even more portrait editing tips and tricks, visit the archive here!