Â
Â
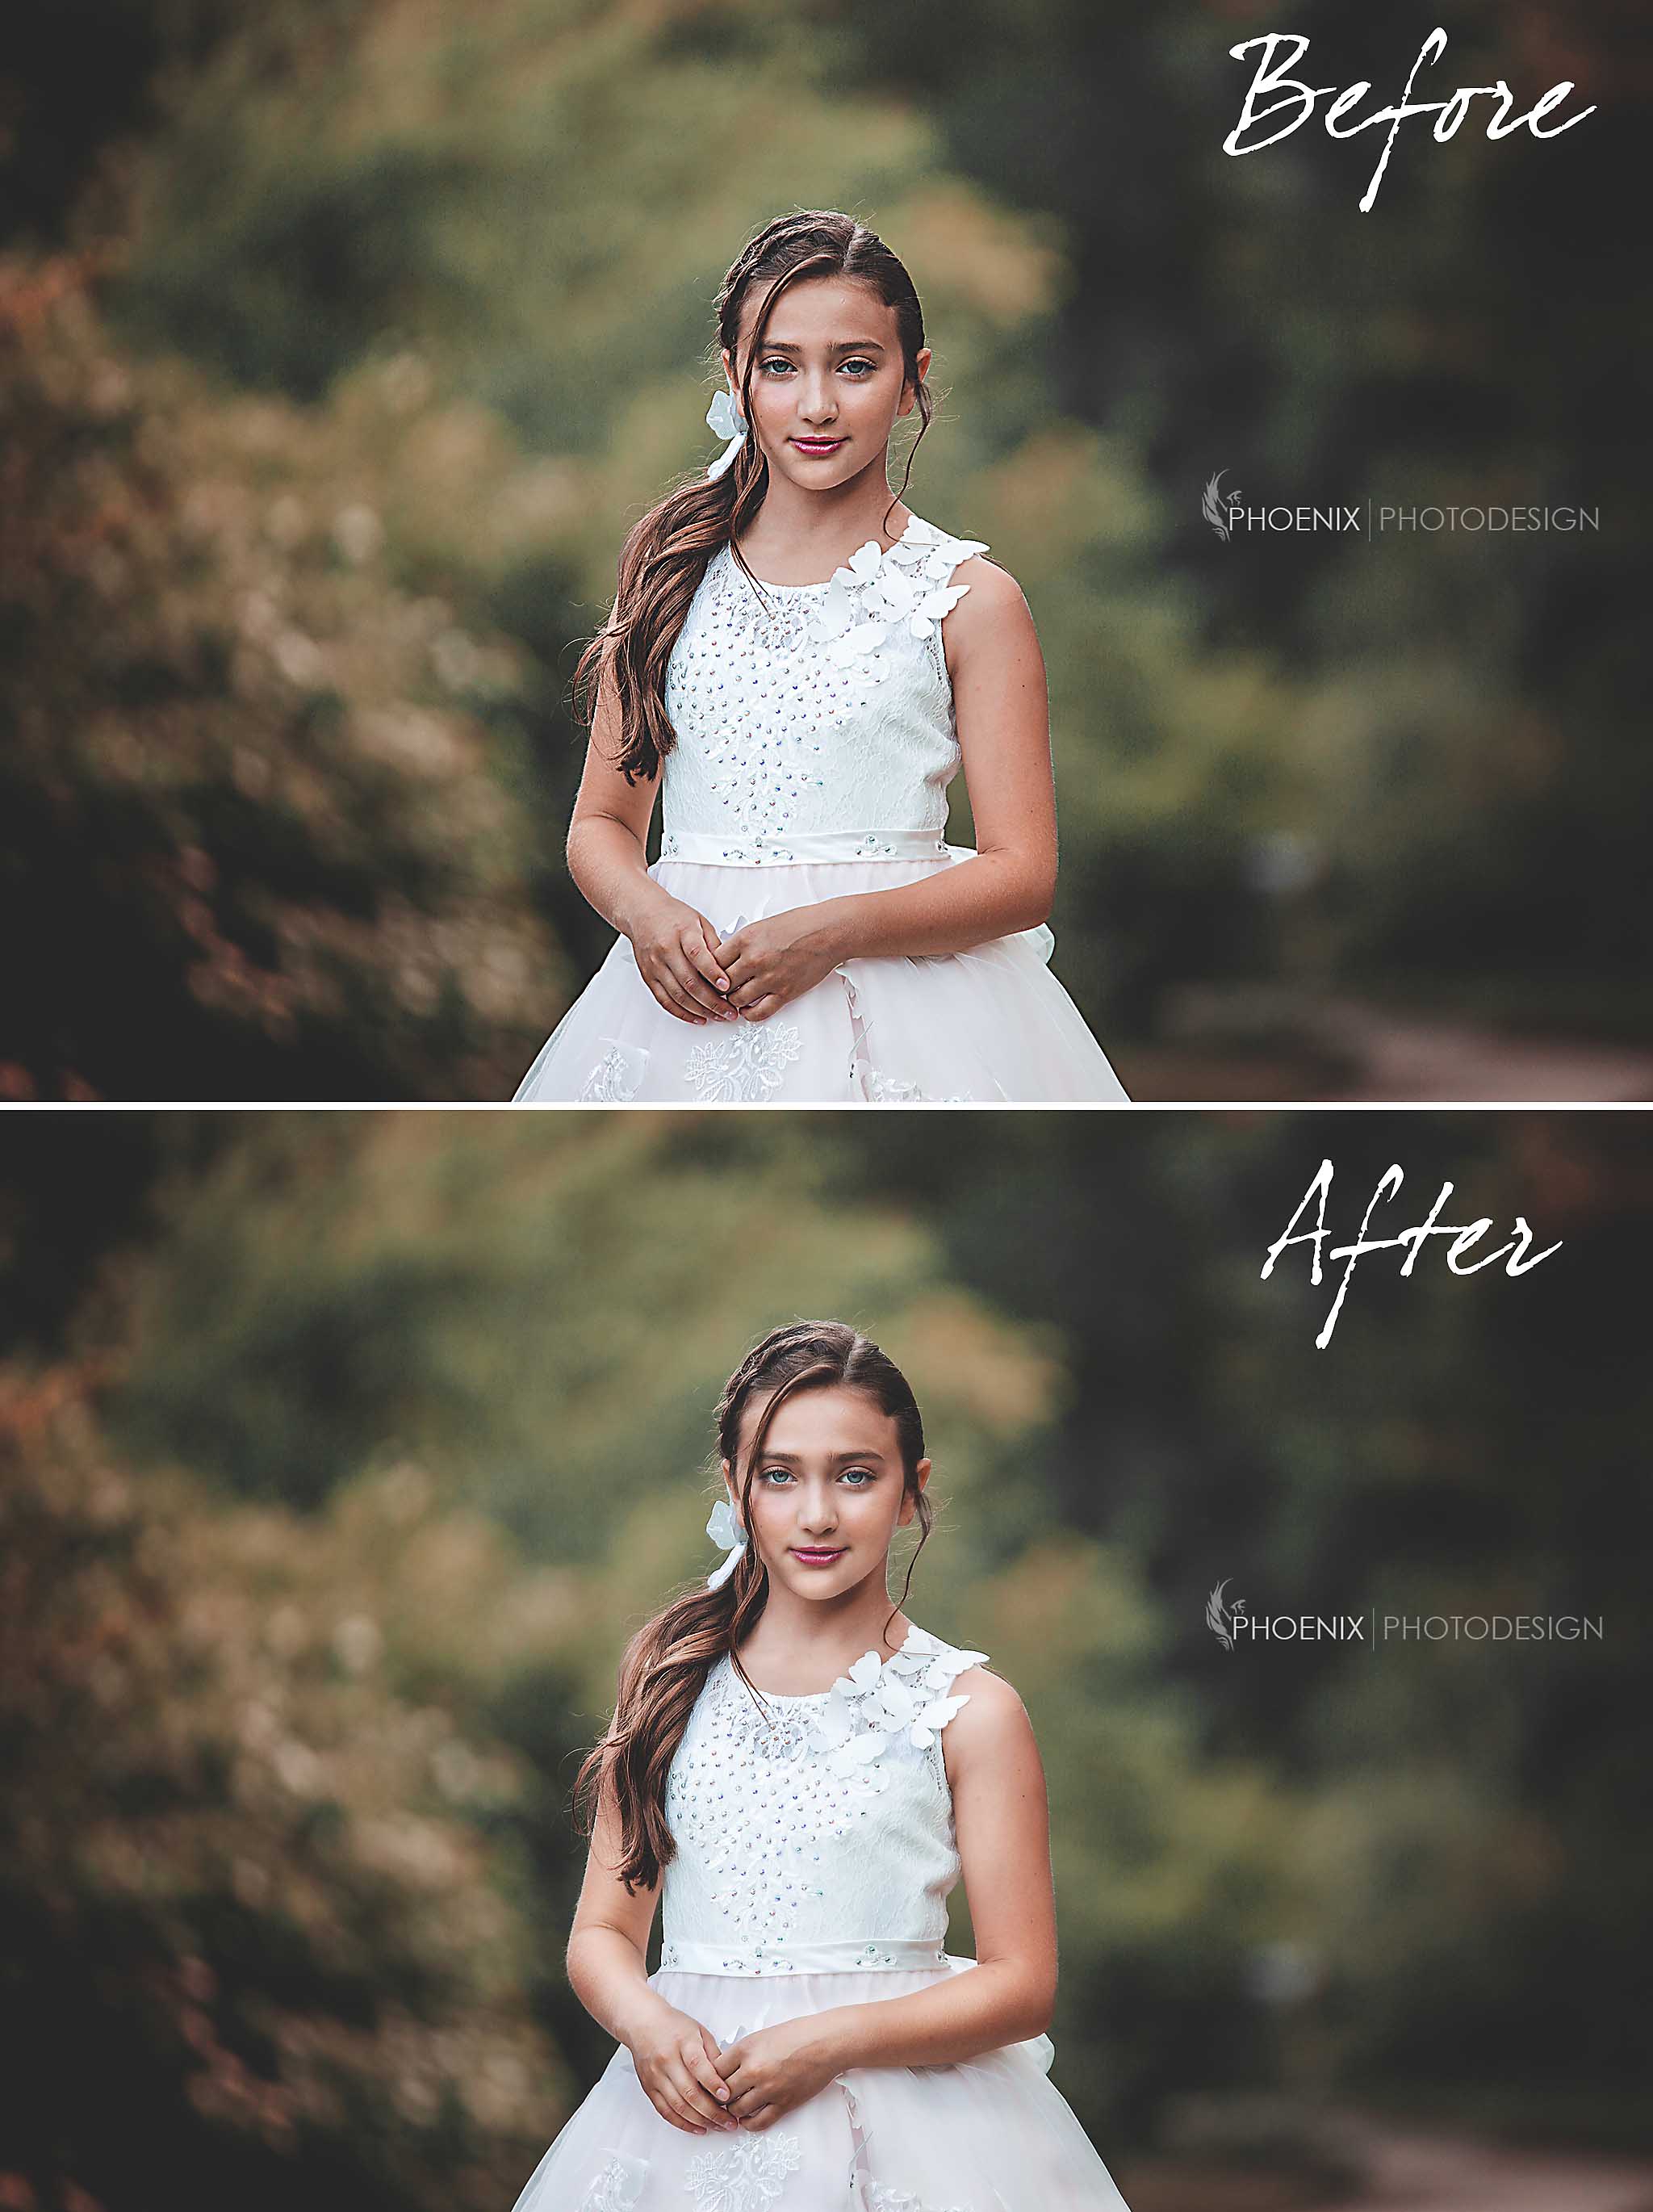
How To Dodge and Burn to Give A Nice Punch To Your Photos!
This awesome editing tip from Derrick Ong with Phoenix Photodesign teaches you how to dodge and burn to give a nice punch to your photos while still giving you total control! I’ve know Derrick for awhile now as he has been a longtime member of my Photography Facebook group, and I *think* he may hold the record for the most “wins” over in the 52 week challenge over there! He really is a master at his craft and I think you’re going to love this editing tip on dodging and burning!
Â
If you have a cool editing tip you’d like to teach others, we’d LOVE to feature YOU on an Editing Tip Tuesday! Simply fill in the form here and we’ll get back to you right away!
1. Make a new curves adjustment layer in Photoshop
2. Click the middle of the diagonal line and drag it a little to the top left corner. This will make your whole image brighter.
3. Click on the layer mask of the curves adjustment layer and fill it with black. This will mask the whole adjustment layer and everything will look the way it did before the adjustment. Name this layer “Dodge”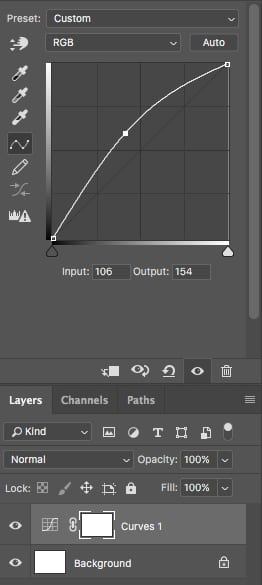
4. Make another curves adjustment layer.
5. This time click the middle of the diagonal line and drag it downwards a little towards the bottom right corner. You’ll see this will make the whole image darker now.
6. Click on the layer mask of that adjustment layer and fill it with black like you just did with the “Dodge” layer.
7. Name this layer “Burn”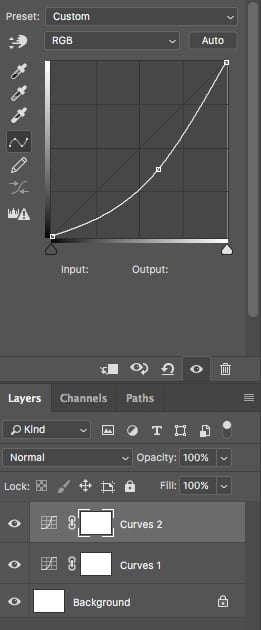
8. Now use your brush tool and set the hardness to 0% and the opacity to 100%.
9. Make sure your foreground color is set to white and click on the layer mask of your “Dodge” layer. Now accentuate your highlights by brushing areas you want lightened in your image. You can go back to the curves adjustment and adjust the brightness to taste.
10. Repeat step 9 on your “Burn” layer to accentuate your darks and shadows of your image. Use this method to brighten or darken areas of clothing, skin, hair, the background and even the eyes. Don’t go overboard! You’ll notice subtle adjustments can make a big difference!
Â
I try out Derrick’s dodge and burn trick on one of my own photos too! Watch below to see the tutorial in action. I think it turned out pretty awesome!!
Â
Learn More About Derrick Ong and Phoenix Photodesign!
Family photographer based on Long Island, New York. I took up photography to document my wife’s pregnancy and our son growing up. With tons of studying along with my background in graphic design, photography and editing photos became a favorite hobby that later turned into a business.
Come check him out and follow Phoenix Photodesign
Website: www.phoenix-photodesign.com
Â

Â